New Features Shipping
New Features: Scheduled Reports
A big shout out to Jim and the team at Wildcard for providing helpful ideas for this feature.
Recipients don’t need an Hourly account and will receive an email with the data (that you’ve defined) in visual and tabular form as well as a CSV attachment.
Scheduled reports compliment the inbuilt emails that Hourly already sends including “Last Week’s Summary” (To admin users) and “Forgotten to Enter Time?”.
Here’s some examples of how you can use scheduled reports:
- An end of month report to a client.
- A daily or weekly report for business owners or team leads about total billables or team members who have incomplete or missing time entries.
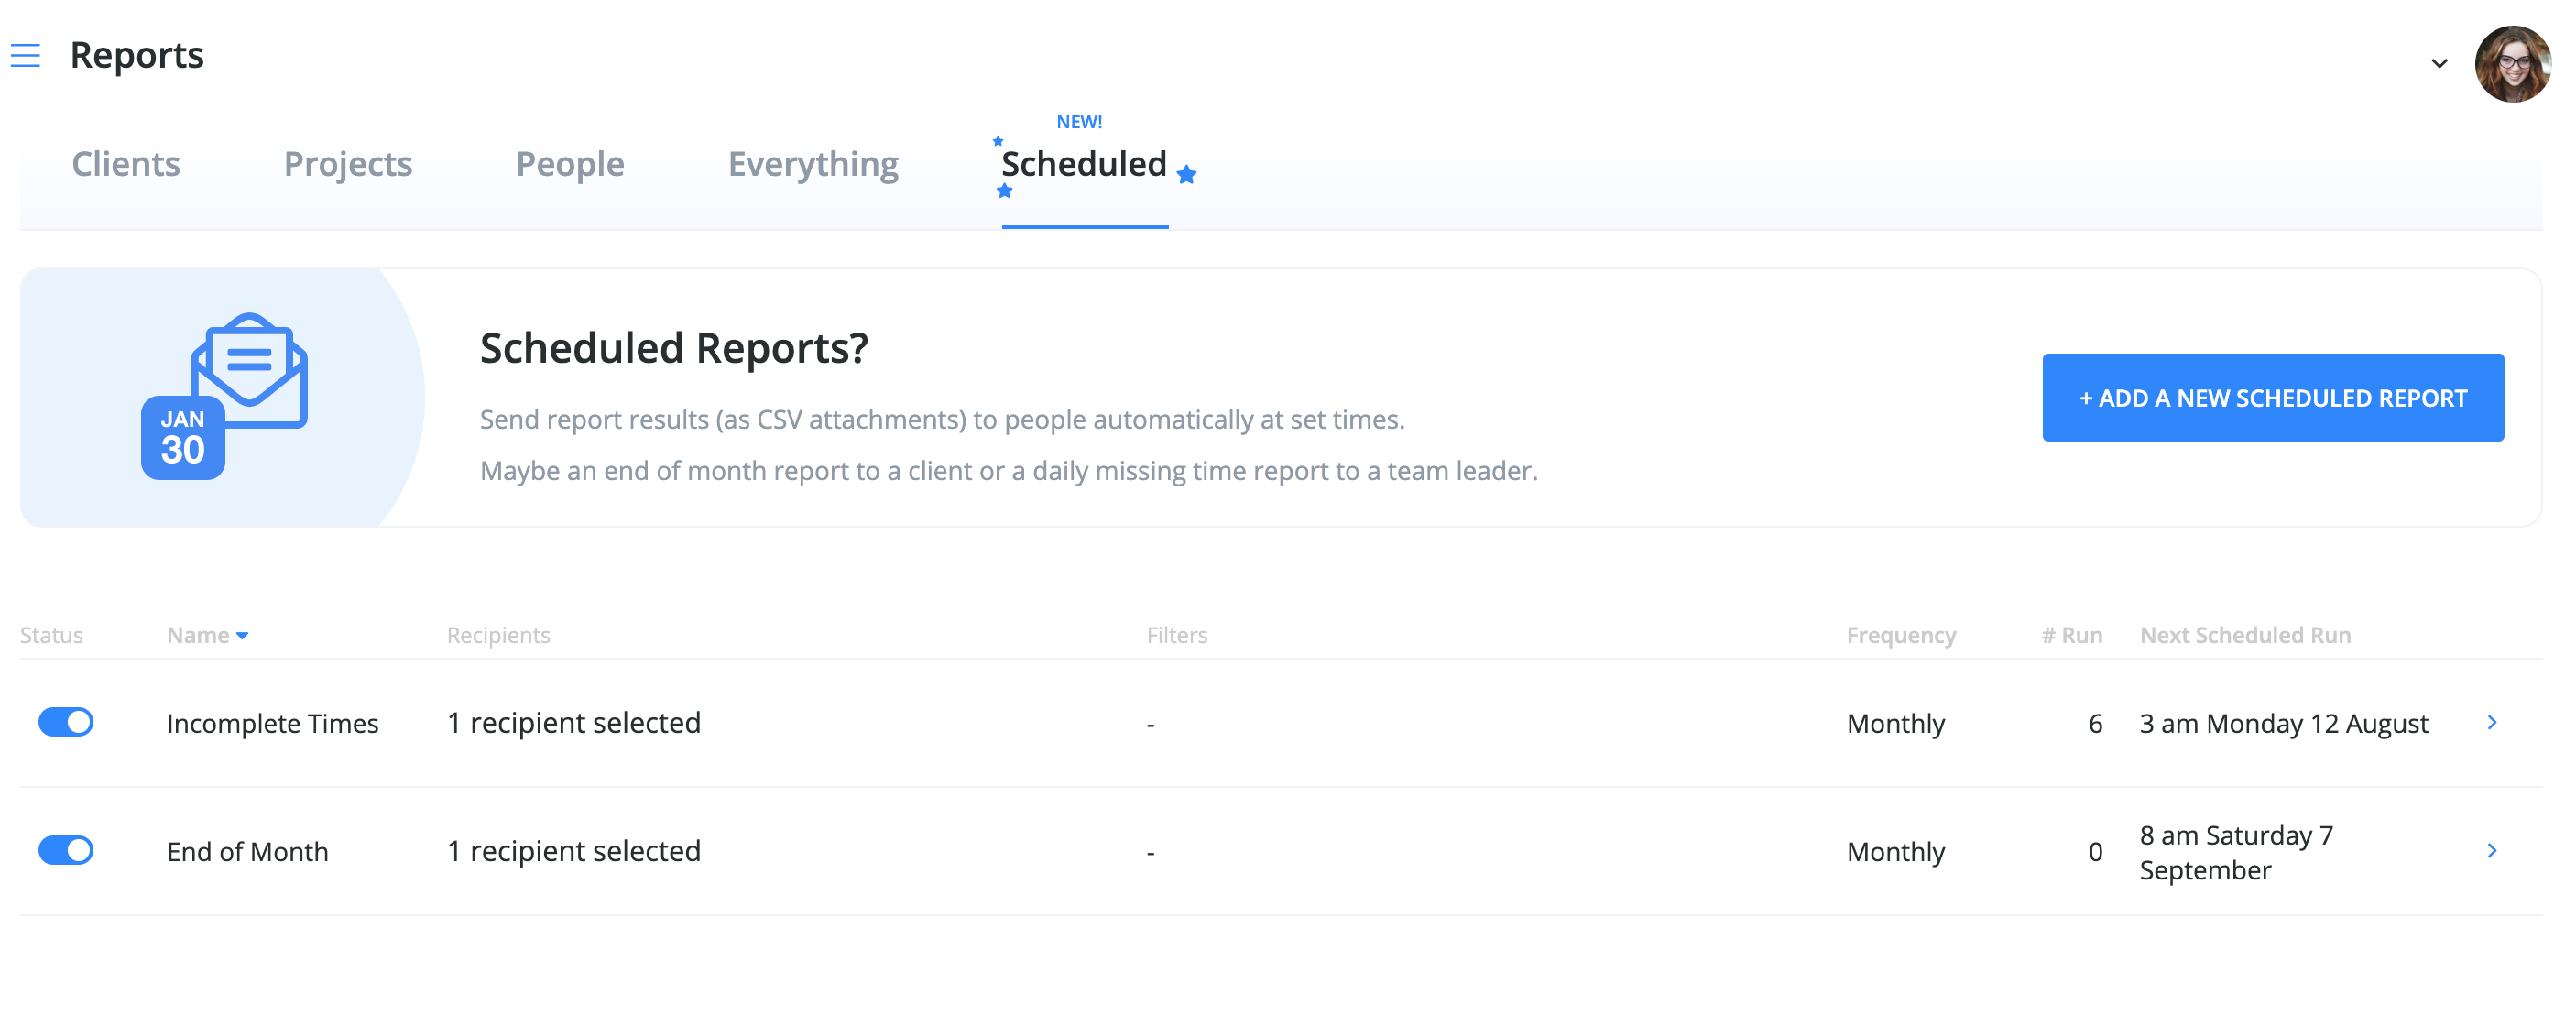
Where do I find Scheduled Reports?
Find them in Reports, under the tab called (wait for it…) Scheduled Reports!
How do I add a Scheduled Report?
Click on the Add button. Here’s what the Add a scheduled report dialog looks like.
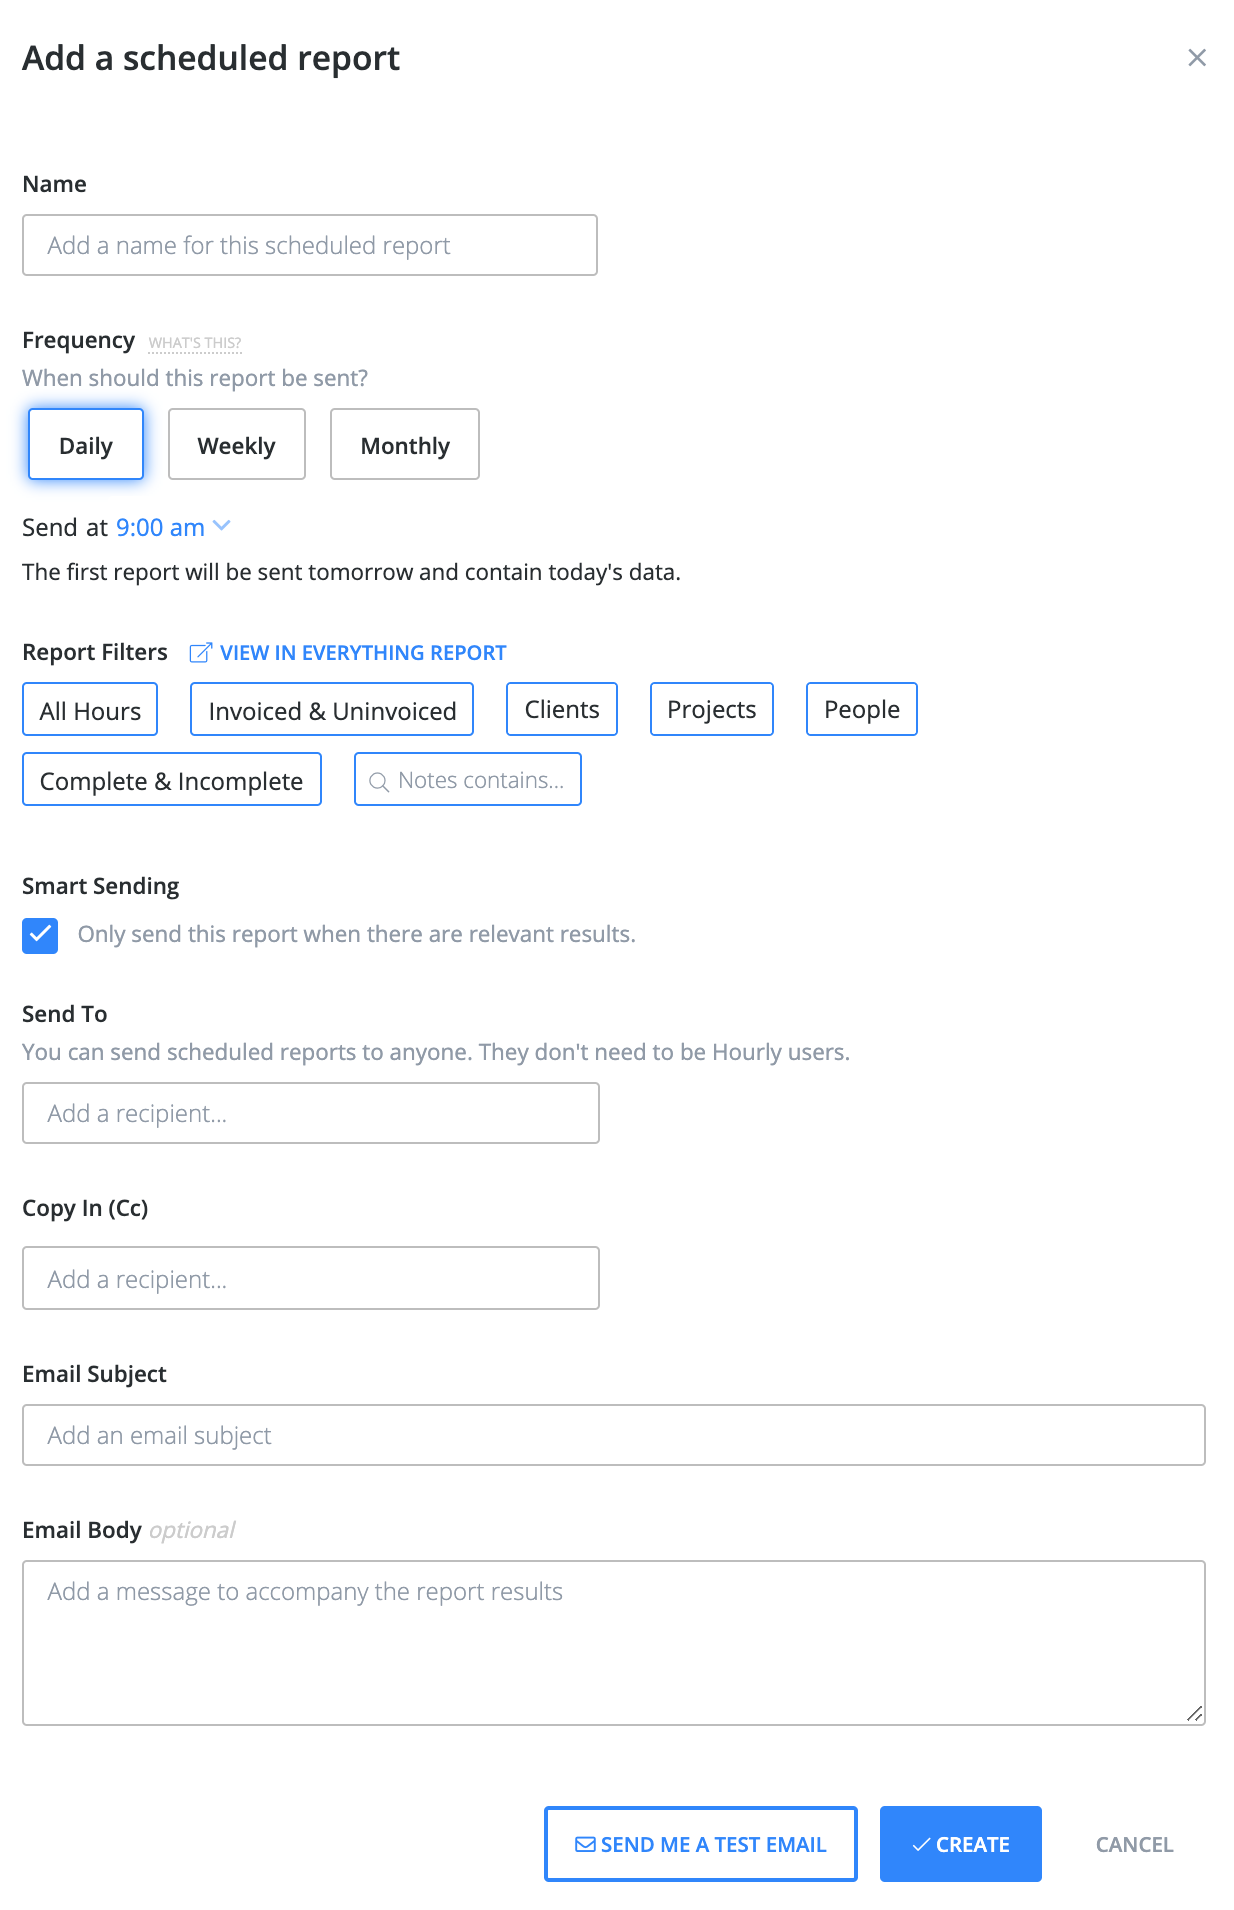
Here’s a break down of everything you see in the screenshot above of the Add dialog.
- Name (A name to help you identify your reports. Note that recipients don’t see this).
- Frequency (This determines when the reports are sent. The options are daily, weekly and monthly). Note that the time and/or day will effect what data is included in the report (See below for more details).
- Report Filters (This determines what information will make up the report and mirrors what you can select in the Everything Report. Click the ‘View in Everything Report’ to see a current snapshot of the report data based on the selected filters).
- Smart Sending (Enable this toggle to only send reports when there is data available that matches the selected filters. Disable this toggle to send reports regardless of whether there is any data — recipients will receive an email letting them know that there isn’t any available data).
- Send To (This is where you add the email addresses of those who will receive the report. Any valid email address is accepted. The accounts don’t have to be associated with Hourly users).
- Copy In (CC) (Exactly the same as Send To but recipients will appear under CC instead of To on the email).
- Email Subject (Enter a subject that will be used for the email when it’s sent).
- Email Body (Optional. Enter any additional text you’d like to add introducing the report data).
To finish up, send yourself a test email using the button at the bottom of the dialog.
Once you’ve finished configuring the report, click Create.
When to Schedule Reports?
Daily Reports
- 5pm is the cut-off time for daily reports.
- For What happened today? reports, schedule your report for any time after 4pm. The report will contain data for the current day up until the time it is generated and sent.
- For What happened yesterday? reports, schedule your report for any time before 4pm (most people choose a time in the morning). The report will contain data for the previous day.
Weekly Reports
- Friday is the cut-off time for weekly reports.
- For What happened this week? reports, schedule your report for any time on Friday, Saturday or Sunday. The report will contain data for the current week up until the time it is generated and sent.
- For What happened last week? reports, schedule your report for any time before midnight on Thursday (most people choose a time in the morning on Monday). The report will contain data for the previous week.
Monthly Reports
- The last day of the month is the cut-off time for monthly reports.
- For What happened this month? reports, schedule your report for any time on the last day of the month. The report will contain data for the current month up until the time it is generated and sent.
- For What happened last month? reports, schedule your report for any time before the last day of the month (most people choose a time early in the start of the new month. The report will contain data for the previous month).
Thanks!
Want to see these features in action? Start tracking your time with Hourly. It’s free for 14 days.


