


Create a client
Create a New Project from the Project Page
1. In the left sidebar, click Clients.
2. Click Add a New Client.
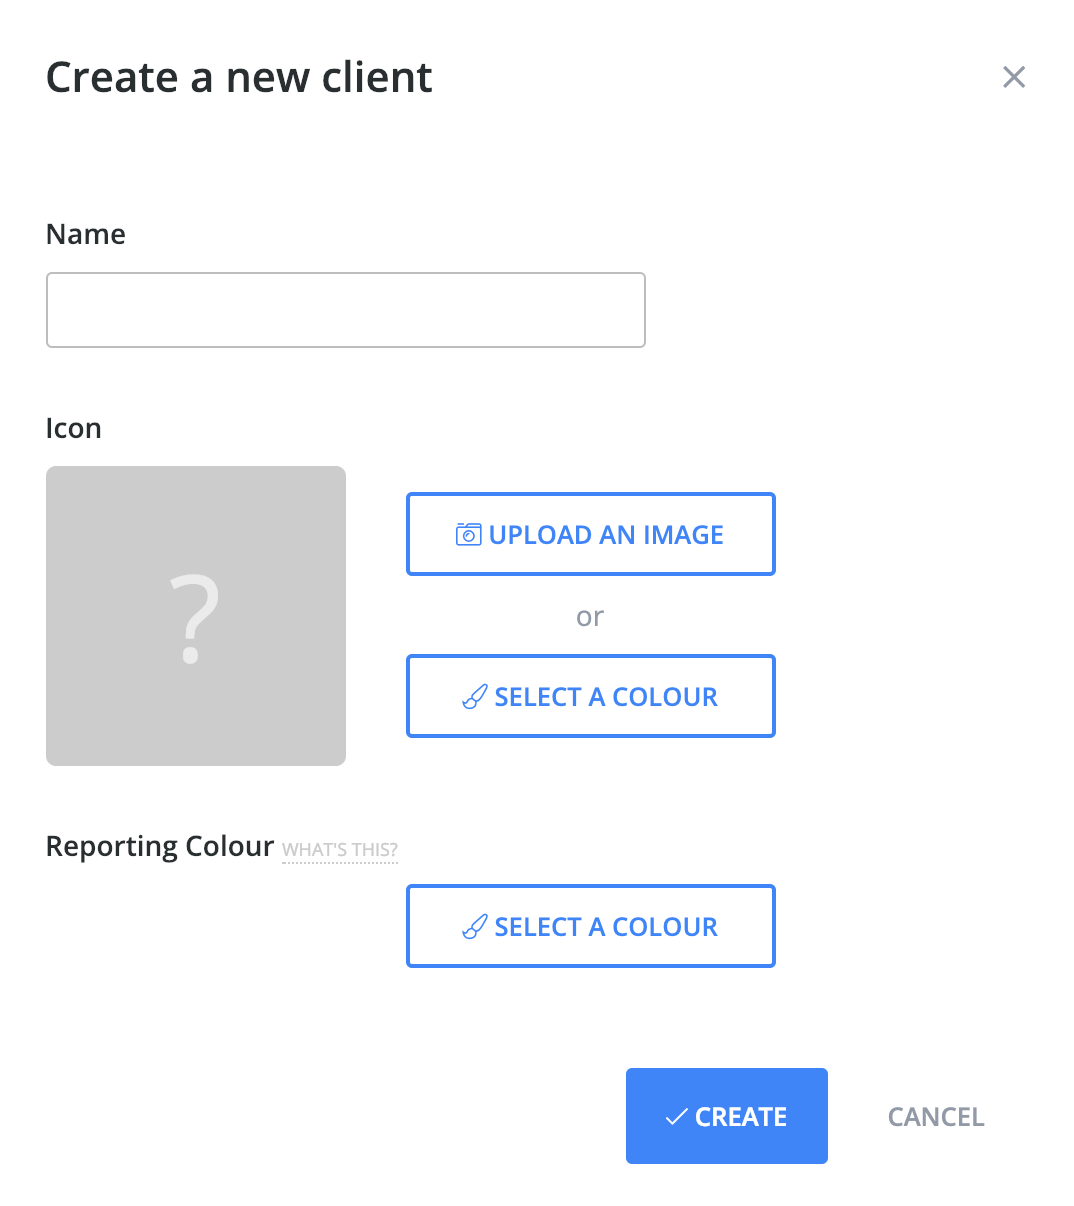
3. Enter a Name for the client.
4. You can add an Image for the client. This makes it easier and faster to recognise clients in Hourly. You can either Upload an Image (PNG, Gif, JPG etc) or Select a Colour using Hourly's inbuilt colour picker which lets you pick a background colour (Hourly uses the client's name to add letters to the icon).
5. You can also add a Reporting Colour. This determines what colour is used for the client in the donut charts used on Hourly's reporting pages.
6. To finish, click the Create button at the bottom of the dialog.
Create a New Client from the Client Drop-Down
1. To save time, you can also create clients from the client drop-down. Click Add a Client.
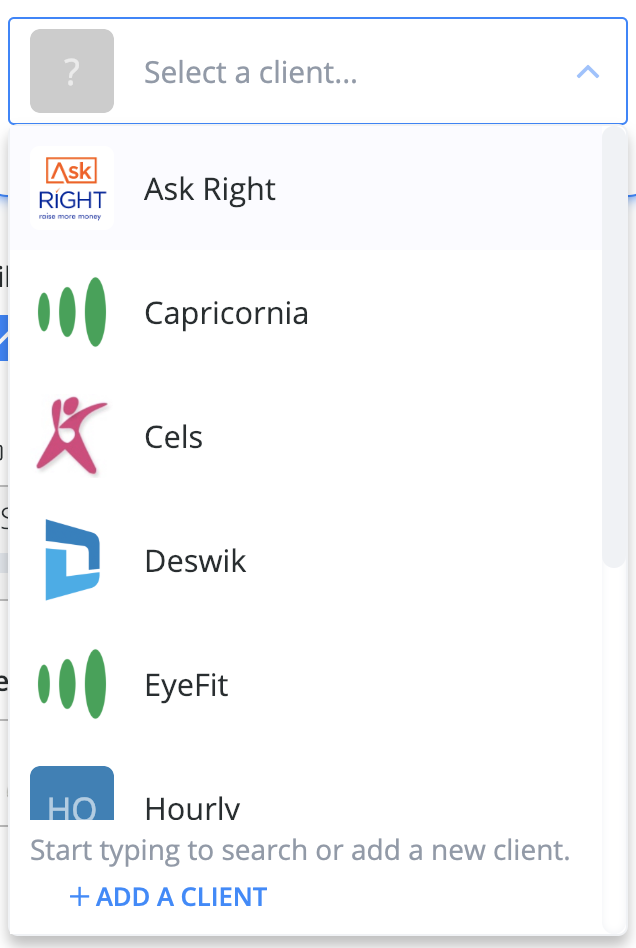
2. Then follow the same steps as above (they're the same).