Create a project
How do Projects Work in Hourly?
Projects are what time entries are linked to for for reporting and billing.
In Hourly, there are two kinds of projects:
Client Projects
Are used for projects where the work is for a client - a company or entity external to your business. Client projects can be billable or non-billable. Billable projects can be linked to budgets.
Internal Projects
Are used when you're working on something internally in your business - for example, recruitment.
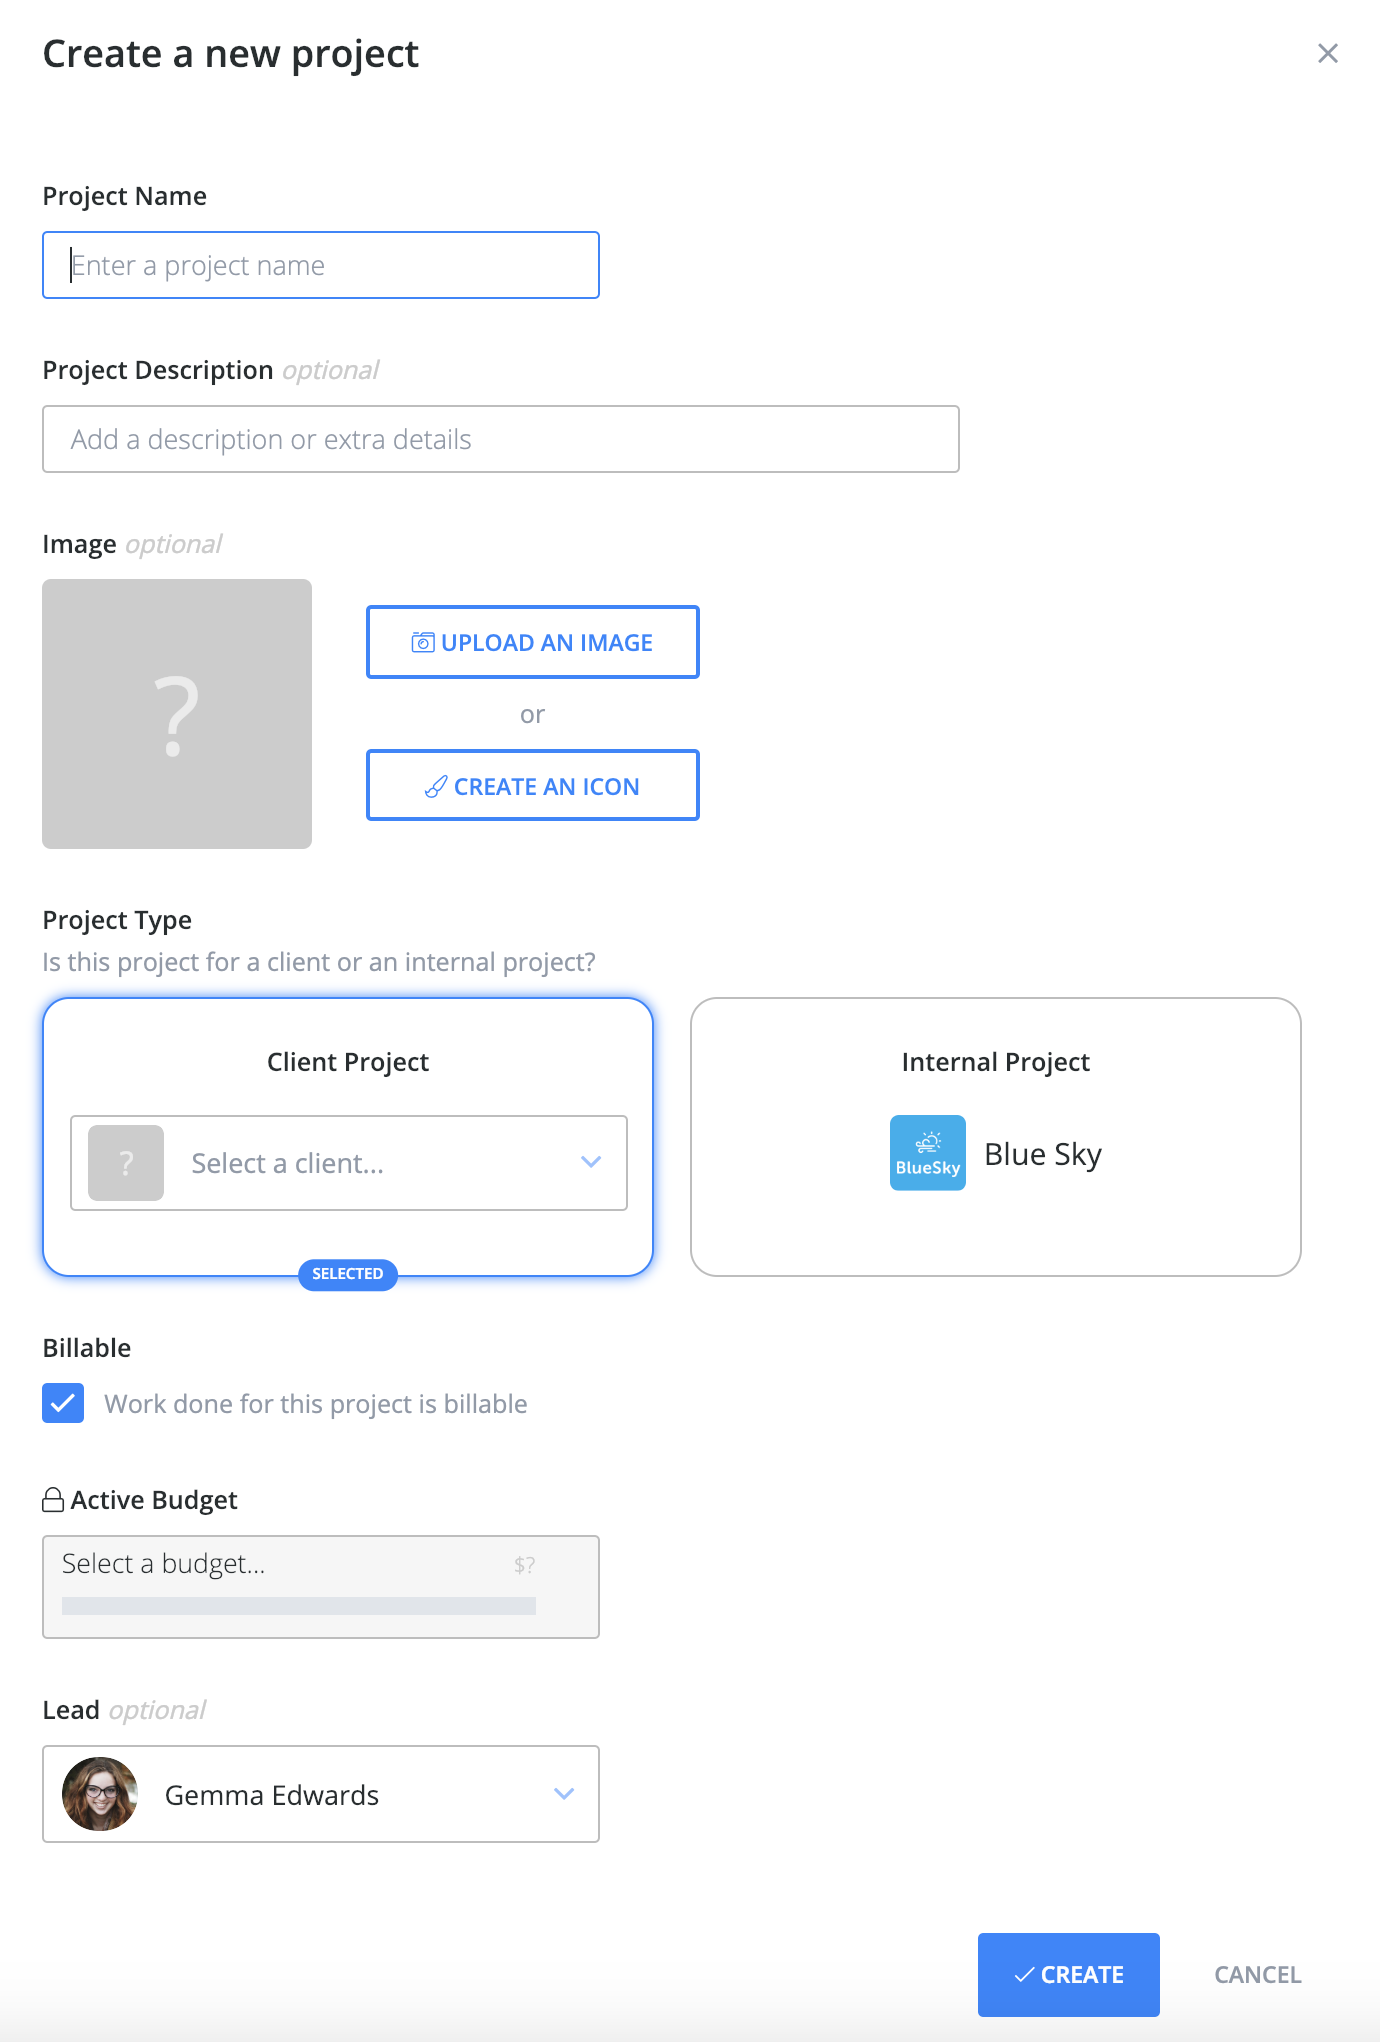
Create a New Project from the Project Page
1. In the left sidebar, click Projects.
2. Click Add a New Project.

3. Enter a Project Name.
4. You can choose to add a Project Description to let team members know what the project is about. This can help others work out which project to track time for.
5. You can also add an Image for the project. This makes it easier and faster to recognise projects in Hourly. You can either Upload an Image (PNG, Gif, JPG etc) or Create an Icon using Hourly's inbuilt tool which lets you pick from an icon collection and set a background colour.
6. Set the Project Type. Pick Client Project for external work or Internal Project for work happening within your business that's not chargeable to any client.
7. For client projects only, use the check box to decide if the project is Billable or Non-Billable.
8. For billable client projects only, you can also select a budget for the project to use. Note: multiple projects can be linked to a single budget.
9. You can also choose to set a Project Lead, this helps team members know who to talk to for questions about the project.
10. To finish, click the Create button at the bottom of the dialog.
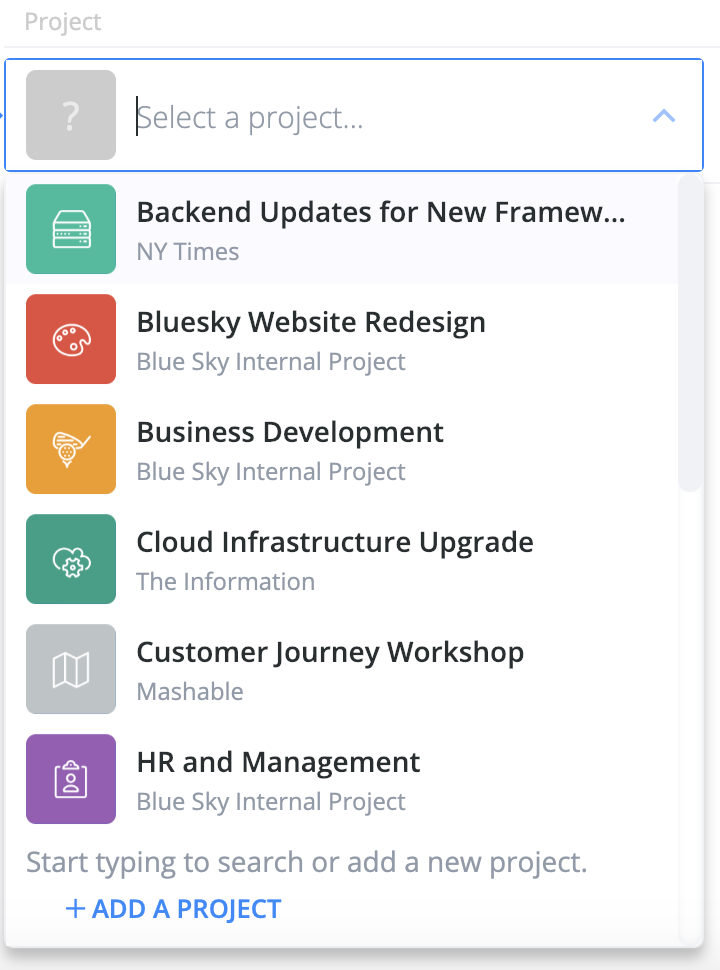
Create a New Project from the Project Drop-Down
1. To save time, you can also create projects from the project drop-down. Click
Add a Project.

2. Then follow the same steps as above (they're the same).


